Thursday, May 28, 2015

Princess Castle Quiet Mat


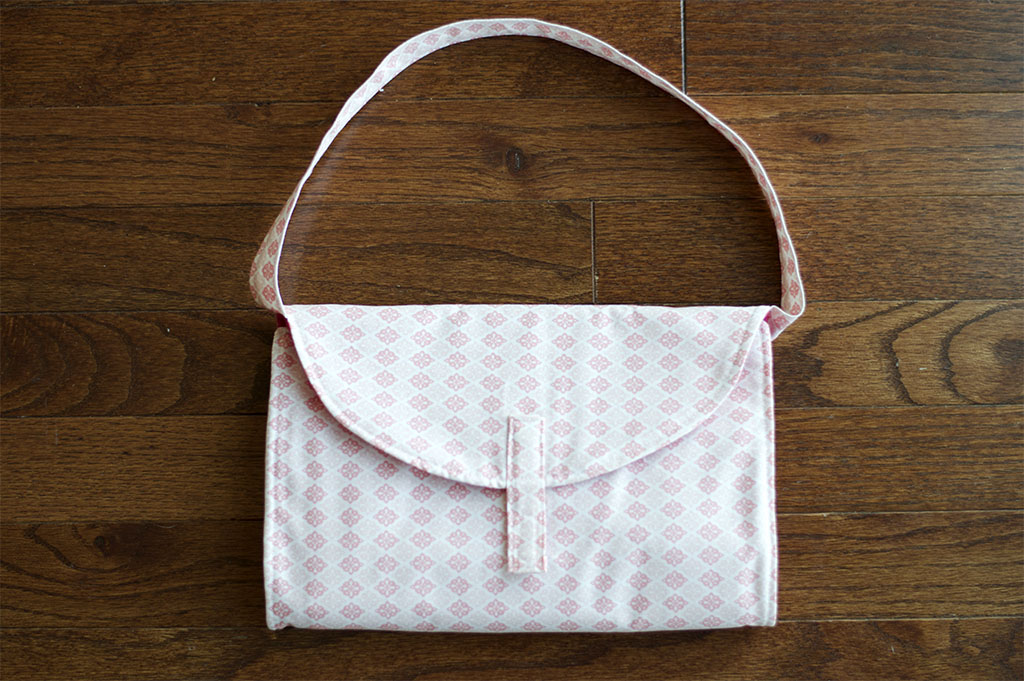
Prepare for a lot of pictures in this post, because I couldn't get enough of this quiet mat!  I made it for a friend's daughter and it was so much fun creating something girly for a change :)  I had to take a ton of pictures before I let it go!

Instead of folding up into a book, this mat folds up into a cute little purse!  It is secured with a velcro strap, and I also sewed a small mirror into the top of the mat.  There are three princesses to play with and they are stored in little pockets behind the towers and the main door.  The princesses are cut from Ann Kelle's fabric line for Robert Kaufman, and I ironed them onto heavy interfacing for structure.


There are four little "fairy tale" icons hidden behind the towers windows.  The middle pink turret is also a pocket that can store small accessories like bracelets and hair clips.


Thursday, May 21, 2015

Felt Pizza Play Food


Instructions


Supplies

For this project I used the following supplies:
  • 3 sheets of tan felt
  • 1 sheet each of white, red, green and beige felt
  • Embroidery floss in white, tan, red and green
  • Two pieces of card stock.  


Prep and Cutting

I made a pattern for the pizza by tracing a 10 inch circle onto two pieces of card stock, then cutting that circle into four quarters.  I used the quarter pieces as patterns to cut out the pizza slices, and later sandwiched the cardstock in between the felt layers to give the pizza slices more stability.  Using one of the slice patterns, I cut out 8 pieces of tan felt (2 per slice) and 4 pieces each of white and red felt (1 per slice).  I cut a few inches off the top of each white piece and cut a wavy edge to look like cheese.

For the crust, I cut four semi-circles out of my remaining tan felt using the slice patterns as a guide. For the toppings, I chose to make pepperoni, green peppers and mushrooms.  Cut two circles out of red felt for each pepperoni, three small strips out of green felt for each pepper, and two small mushroom shapes out of beige felt for the mushrooms.

Pizza

For each pizza slice, I started by layering the white cheese on top of a red piece of felt and a tan piece of felt.  I sewed the three layers together only going around the white shape with a blanket stitch.  Next, I added a piece of cardstock and another piece of tan felt to the bottom of that, and added a piece of crust along the top edge.  I blanket stitched around the crust shape, going through all layers of felt and cardstock, then blanket stitched down the two remaining sides of the pizza slice.  I trimmed down the cardstock patterns first to make them a little smaller than each pizza slice so I wouldn't be pushing my needle through them.


Toppings

All of the toppings were easy to make, once everything was cut out! The pepperonis and mushrooms are just two layers of each shape, blanket stitched together.  The peppers are each made from three strips of green felt.  Start by lining up the ends of two strips, and sewing a few stitches through to secure them together.  Then, line the third strip up to one of the free ends, and sew those together.  Lastly, take the two remaining ends and sew them together with a few stitches.  It should look like a warped triangle, and when you turn it inside out it curls into a little pepper shape.  


Saturday, April 11, 2015

Goodnight Moon Quiet Mat


For this quiet mat, I wanted to recreate the green room from Goodnight Moon.  Rhys is still learning colors so I thought this would make a perfect I Spy activity, since there are so many details to pick from.  There are 7 colorful objects hidden around the room for him to find.  The scene wouldn't look complete without including the cow painting and the striped curtains, so I printed those images onto printable fabric and lightly ironed them to the felt.

The background is made of one long rectangle of green felt, and two pieces of red felt on the bottom to make the floor.  I did a poor job of gluing the red felt down near the edges where the two pieces meet, but I don't think Rhys will mind ;)  All of the objects in the room were sewn down using a whip stitch.  The cover is made from a piece of cotton fabric and fusible interfacing (pellon 808) for structure.  It closes like a book and is secured by a strap with velcro.  See the pictures below for all of the hidden objects in the room!

White Moon

Black Yarn*
*I ran out of black floss so it turned into a gray ball of yarn instead

Brown Bear

Blue Clock

Orange Socks

Purple Mittens

Red Balloon


Monday, March 30, 2015

Fabric Tote Easter Basket - Tutorial


For this project you will need two patterns of fabric: one for the outside of the bag and one for the lining.  Two fat quarters will provide enough fabric to make this bag, with a little left over for other projects!  You will also need fusible interfacing if you want to give the bag structure.


1. Start by ironing and cutting your four pieces of fabric.  For the bag, cut two pieces of 12x18 inch fabric (one from each fabric).  For my bag, the blue fabric will be used as the outside of the bag and the white chevron will be used for the lining.  For the strap, cut two long strips of fabric 3.5 inches wide and 16 inches long using the same two fabrics.
2. I used fusible interfacing (pellon 808) on the back of my bag fabric to give the bag some structure. If you use interfacing, cut a 12x18 inch piece and iron it onto the back of the fabric.  I just barely had enough interfacing left for this project, which is why you can see some of my bag fabric peeking out on the side.
3. Take both pieces of 12x18 inch bag fabric and fold them over lengthwise to form a 12x9 inch rectangle.  Make sure you fold them right sides together and pin them in place for sewing.  Teak each fabric separately and sew along both outside edges and the bottom folded edge, leaving the top edge open to form the opening of the bag.  I used a 1/4 inch seam allowance.
 4. Once you finish sewing three sides of the bag fabric, locate the two corners on the bottom of the bag.
 5. Place your hand into the bag and flatten the bottom corner to form a triangle.  Line up the bottom seam and the side seam of the bag and press them both in the same direction.
6.  Measure about 2 inches up from the tip of the triangle and sew a straight line from one edge to the other.
 7. Once you finish sewing both corners, cut off the tip of the triangle you made above the seam line.
8. Reach into the bag and push the new corners out to square them off.  Your bag (still inside out) should stand up now!
 9. Repeat the same steps for the lining.  Here you can see how the bag fabric looks with interfacing compared to the lining.
 10.  Now you are ready to sew the strap!  Place your two pieces of 3.5x16 inch fabric together, right sides facing, and pin them for sewing.  It's hard to tell here, but that is the back side of the
blue fabric.
 11.  Sew along both long edges with a 1/4 inch seam allowance.  You can also sew along one short edge, just keep one short edge open!  When you are done sewing, turn the strap right side out.
12. Iron the strap or just press it down if you are lazy like me :) The unfinished edge will be hidden in the finished bag, so don't worry about top stitching the strap unless you want to.
13. Now it's time to assemble all the pieces!  Keeping the body of your bag inside out, place the strap down into the bag with the top side facing down.  Whichever fabric you want to show on the top of the strap, make sure this fabric is facing down into the bag.  Line the strap up with the two seams on opposite sides of your bag.


 14. Next, place the lining down into the bag on top of the strap.  Make sure you turn your lining right side out before placing it into the bag.
15. Line up the two seams of the lining with the two seams of the bag body and align the ends of the straps with these seams.  Pin all three layers in place at the two sides, then pin all the way around the top of the bag.
 16. Sew around the top edge of the bag with a 1/4 inch seam allowance.  It doesn't matter where you start, but make sure you sew over both ends of the strap and leave a 3 inch opening at the end so you can turn the bag.  When you get to a side seam, check to make sure your strap is still in place and backstitch over it to make sure it stays secure.
 When you are finished sewing, your bag should look like this.
 17. Find the three 3 inch opening you left...
...and carefully push the bag right side out through that opening.
18. It will come out looking something like this. Push the lining down into the bag and smooth out all of the fabric.  Push out the corners at the bottom of the bag and...


...now it actually looks like a bag!
 19. Find the 3 inch opening you left in the seam and press and pin the fabric in place.
20. Top stitch around the top of the bag to close up the hole and to finish the seam.  Sew as close to the seam as possible to catch the fabric at the opening.


And you're done!  You can iron it again to smooth out the wrinkles, or leave it if you're going to hand it off to a destructive toddler anyway ;)


Copyright © 2014 Today I Felt Crafty