Sunday, July 26, 2015

Melted Crayon Canvas Art


I've seen this idea floating around Pinterest for years, and I finally tried it out this weekend.  I wanted to make something artsy to decorate a little side room that is currently serving as Rhys's art room. I thought this idea would be a perfect fit, plus I was able to repurpose 3 canvases from his old nursery that have been sitting in his closet since our move!

Long story short: I love the end result, but this project does take some patience.  It takes a few minutes for the wax to heat up before it starts melting, but it's oh so satisfying when it finally does!

Materials
2 boxes of 64 crayons
3 white canvases (12x12 inches)
Glue gun
Hairdryer
Drop cloth or newspaper
Cardboard to help support the canvases


To start, I emptied my two packs of crayons and sorted them by color.  I left out most of the tan/brown crayons and the rest fit perfectly across the three canvases.

After I sorted the colors, I arranged them evenly across the top of the three canvases and started gluing them down.  I took off two crayons at a time and just made a small strip of glue to hold down each crayon. I tried my best to line up the wrappers to keep them all uniform.


Next, I took one canvas at a time and propped it against a piece of cardboard in the garage.  I put a drop cloth down to catch any wax that might spray, but I didn't have any problem with that.  I used the lowest setting on my hairdryer and focused on heating up 4-6 crayons at a time.  The high setting probably would have moved this along quicker, but it would've given a more splattered look instead of the cleaner lines I was trying to get.

I let the wax drip a few inches before moving on to the next group of crayons.  I kept the end of the hairdryer pointed at the tips of the crayons, so most of the lines dripped straight down.  Sometimes I used the hairdryer to help a streak of wax melt a little more, or to gently tap a crayon if the wax wasn't dripping.  Overall, it was a very easy project, but melting the wax takes some patience if you want it to drip in clean lines.


Here's the end result!! I love the way they turned out, but would have liked longer streaks if i'd had the patience to keep going :)


Also, shout out to my husband for finding this beautiful light by our office window and suggesting I shoot in here!


I could have taken pictures of these all day!  The colors look so beautiful!


Monday, July 13, 2015

Dr. Seuss Pillow Letters


A few months ago, I bought this Dr. Seuss fabric panel with the intent of making some sort of wall hanging for Rhys's new room.  It sat in my stock pile while I worked on other projects and I finally pulled it out this weekend!  Rhys loves playing with his felt toys while I'm in my craft room, so I decided to turn this panel into something he could play with.  I sorted through my felt stash and realized that I had felt colors to match the letter block colors!  I think these would have been super cute with a white Dr. Seuss Fabric (here or here) as a backing instead of felt, but I love the pop of the contrasting colors on the back!


This was such an easy project!  I cut the letters out into 6x6 inch blocks, and then cut 26 squares of felt in the same size.  I pinned a felt piece to the front of each letter, then sewed around all four sides of the letter block, leaving a small opening to turn each block right side out.  This is a great beginner's sewing project, because you can just follow along the straight edge of the letter like the green U block below.

Here are a few pictures I took with my cell phone during the process.


Once I sewed all 26 pairs of letters and felt, I cut off all the corners and turned them right side out.  I stuffed all of them with poly fill and then parked myself in front of the TV while I hand stitched the openings closed.  I love the way they turned out and I can't wait to give them to Rhys for his birthday!


Tuesday, July 7, 2015

Little Princess Busy Mat


This is the first item I'm sharing that will be listed for sale in a future Etsy shop!  Woo hoo!  I am slowly building a stock of things to sell, including some felt food and more play mats.  I was hoping to open it this summer, but personal projects and planning for Rhys's birthday have slowed my progress.  I finished this mat a few weeks ago and couldn't wait to share it!


This mat is a little different from others that I've made.  I put a layer of quilt batting in between the felt and cotton to give it more body, and I used satin ribbon to tie the mat closed.  There are four activities to keep busy little girls entertained.  The felt shapes velcro onto their matching shapes or can be stored in the pocket .  The I Spy window is made with clear vinyl and there are 5 princess icons hidden in the beads.  The three zippers are great for little fingers (Rhys loves them!) and the strings of beads include three animal beads and are secured to the mat with eyelets.


PS - I'm in love with this princess crown fabric and I'm also making a blue and pink version that will be listed as well!  Keep an eye out at the end of summer and hopefully I'll have a shop open!


Thursday, May 28, 2015

Princess Castle Quiet Mat


Prepare for a lot of pictures in this post, because I couldn't get enough of this quiet mat!  I made it for a friend's daughter and it was so much fun creating something girly for a change :)  I had to take a ton of pictures before I let it go!

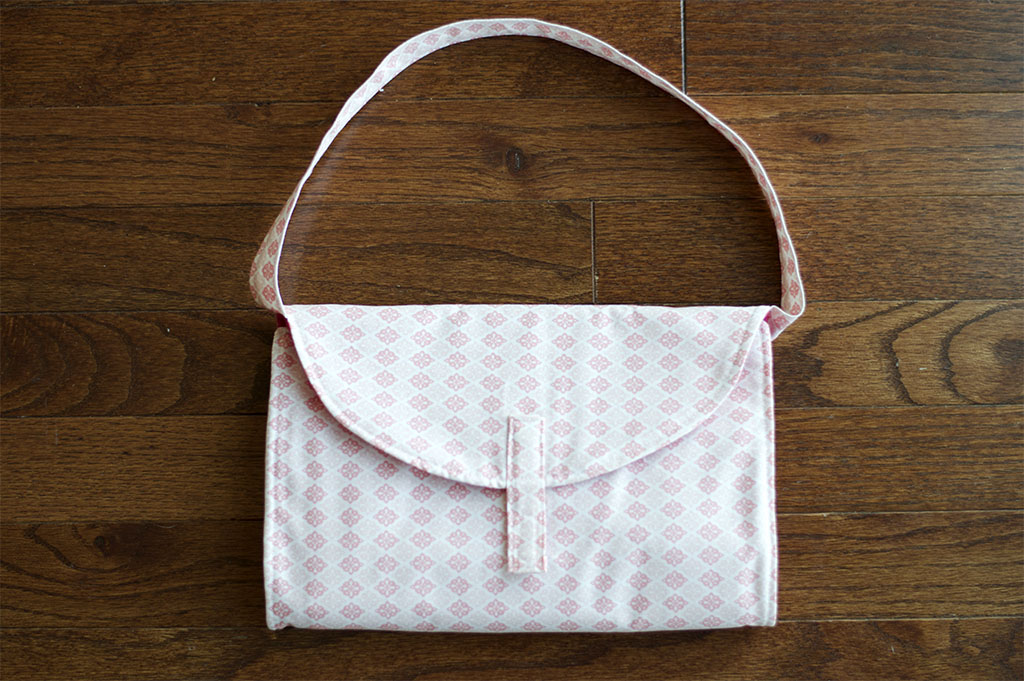
Instead of folding up into a book, this mat folds up into a cute little purse!  It is secured with a velcro strap, and I also sewed a small mirror into the top of the mat.  There are three princesses to play with and they are stored in little pockets behind the towers and the main door.  The princesses are cut from Ann Kelle's fabric line for Robert Kaufman, and I ironed them onto heavy interfacing for structure.


There are four little "fairy tale" icons hidden behind the towers windows.  The middle pink turret is also a pocket that can store small accessories like bracelets and hair clips.


Thursday, May 21, 2015

Felt Pizza Play Food


Instructions


Supplies

For this project I used the following supplies:
  • 3 sheets of tan felt
  • 1 sheet each of white, red, green and beige felt
  • Embroidery floss in white, tan, red and green
  • Two pieces of card stock.  


Prep and Cutting

I made a pattern for the pizza by tracing a 10 inch circle onto two pieces of card stock, then cutting that circle into four quarters.  I used the quarter pieces as patterns to cut out the pizza slices, and later sandwiched the cardstock in between the felt layers to give the pizza slices more stability.  Using one of the slice patterns, I cut out 8 pieces of tan felt (2 per slice) and 4 pieces each of white and red felt (1 per slice).  I cut a few inches off the top of each white piece and cut a wavy edge to look like cheese.

For the crust, I cut four semi-circles out of my remaining tan felt using the slice patterns as a guide. For the toppings, I chose to make pepperoni, green peppers and mushrooms.  Cut two circles out of red felt for each pepperoni, three small strips out of green felt for each pepper, and two small mushroom shapes out of beige felt for the mushrooms.

Pizza

For each pizza slice, I started by layering the white cheese on top of a red piece of felt and a tan piece of felt.  I sewed the three layers together only going around the white shape with a blanket stitch.  Next, I added a piece of cardstock and another piece of tan felt to the bottom of that, and added a piece of crust along the top edge.  I blanket stitched around the crust shape, going through all layers of felt and cardstock, then blanket stitched down the two remaining sides of the pizza slice.  I trimmed down the cardstock patterns first to make them a little smaller than each pizza slice so I wouldn't be pushing my needle through them.


Toppings

All of the toppings were easy to make, once everything was cut out! The pepperonis and mushrooms are just two layers of each shape, blanket stitched together.  The peppers are each made from three strips of green felt.  Start by lining up the ends of two strips, and sewing a few stitches through to secure them together.  Then, line the third strip up to one of the free ends, and sew those together.  Lastly, take the two remaining ends and sew them together with a few stitches.  It should look like a warped triangle, and when you turn it inside out it curls into a little pepper shape.  


Copyright © 2014 Today I Felt Crafty