Tuesday, January 19, 2016

Valentine's Day Quiet Book


It's been a year since I started this blog to share my crafts, and I'm so happy to look back and see how my style has changed (and hopefully improved) in a year! One of the first projects I shared on this blog was a Valentine's Day Quiet Mat.  I hand sewed all of the activities on that mat, and I loved how everything turned out!

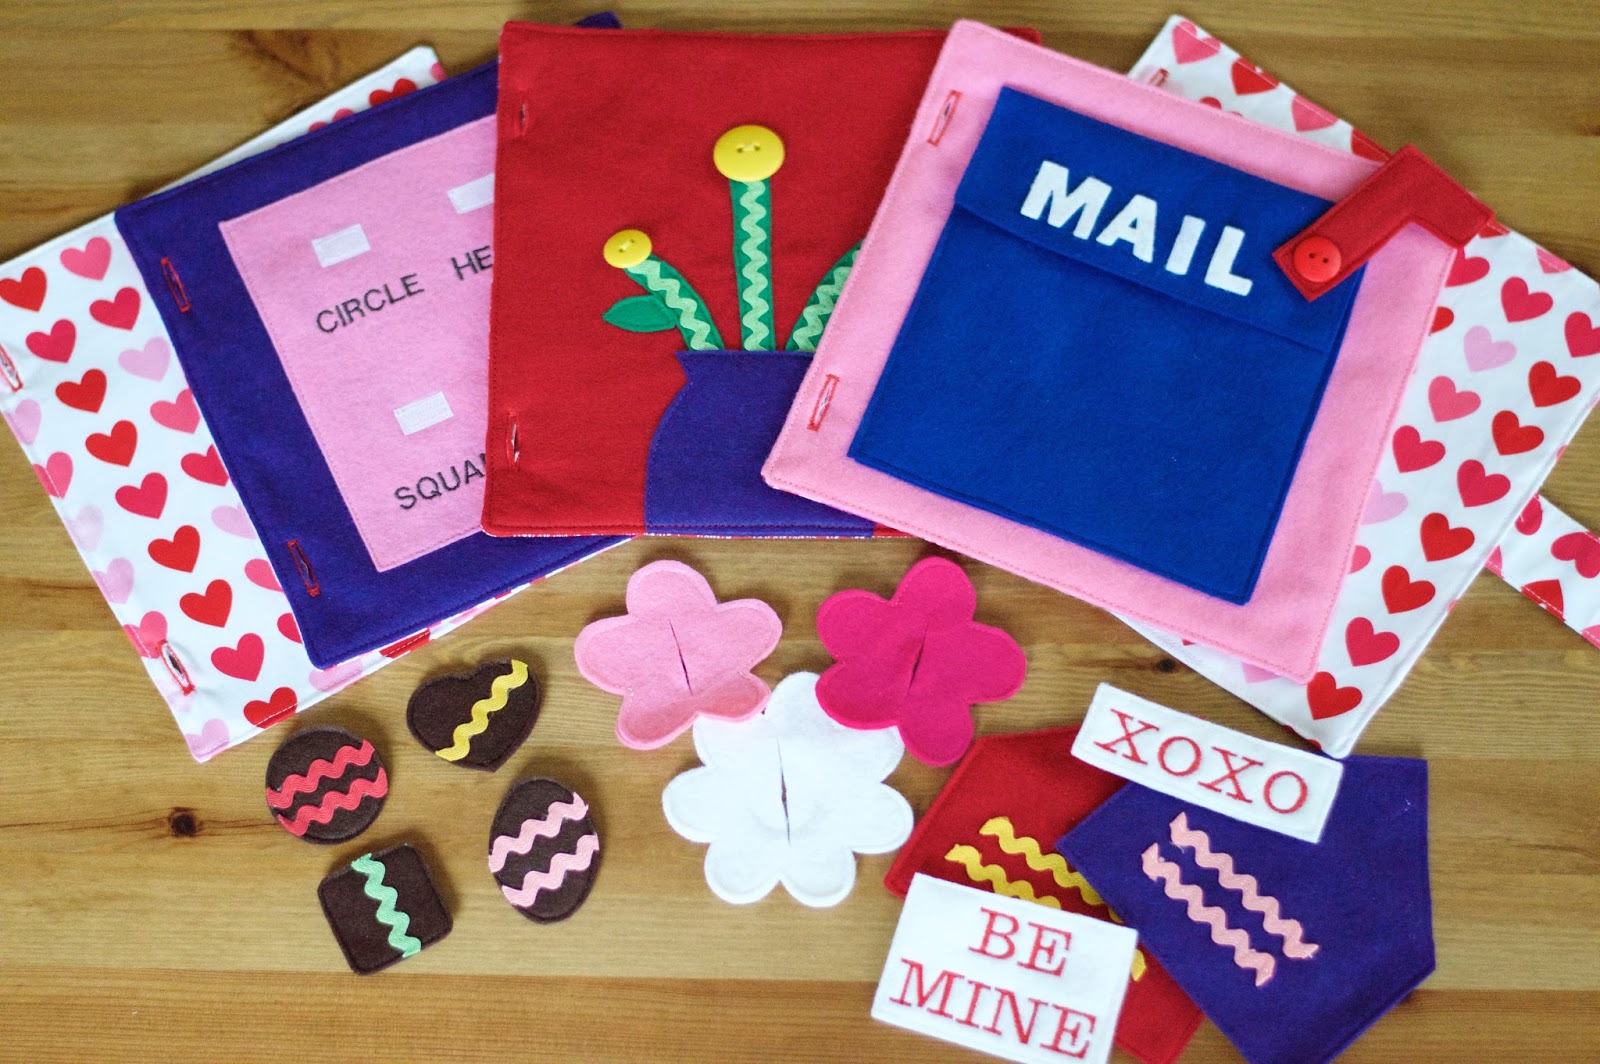
Now, a year later, I have a lot more experience with my sewing machine AND a new embroidery machine!  I was able to make two of these books in the time it took me to sew that one quiet mat from last year.  Two of these books are listed for sale in my Etsy shop and they would make great gifts for little ones on Valentine's Day!  Take a look below for more pictures!


There are three pages with different activities.  The first page has three flowers that button on and off of the stems.  The second page has four chocolate shapes that velcro on with their matching shape names.  The last page has a mail box that holds two felt envelopes, plus a sweet Valentine's Day message in each envelope!


Here are some close up pictures of the activities:


And because I love this fabric so much, here are some pictures of the backs of the pages!


Thursday, December 31, 2015

Rainbow Quiet Book 2


I took a break from selling on Etsy for most of December to devote some time to personal craft projects and learning to use my Christmas gift from my husband...a new embroidery machine!  I am in love with it and I can't wait to make some fun toys for the shop with it.  In the meantime, I wanted to make another quiet book for Rhys to play with during our Christmas road trip, and I finished it just before we left!

This book is similar to my first Rainbow Quiet Book, but I included different activities in this book and added decorate buttons to most of the pages to use up some of my button stash :)  I also fastened the pages with button holes and baby links this time, instead of grommets and binder rings.

I embroidered my son's name onto a piece of felt and sewed it to the cover.  It's not perfectly straight but I'm happy with it!


The red page is a lacing activity (remember my Quidditch lacing page?) where he can lace a white string through the loops of ribbon on the rainbow.  The string is stored behind the clouds at the bottom of the page and I glued blue felt to the tip of the string to make it stiffer and easier to lace.


The orange page is an I Spy activity with different colored button shapes hidden in the white buttons. I also sewed matching buttons around the border as a guide for what to look for.

The yellow page has a rainbow of six zippers to play with, because he can never have enough zippers!

The green page is a buckle/weaving activity that includes six buckles.  It was a little tricky trying to figure out the placement of the buckles to get them to overlap without covering each other, but I love how it turned out!

The blue page is a shape matching activity, and it was my first attempt at using my embroidery machine! The shapes were all sewn by the machine which is why they look awesome and perfect :)


The turquoise page was my second attempt with the embroidery machine and again...I was so impressed!  I embroidered the color names onto each piece of felt, and then stitched a rectangle around each one to make them into little tiles that Rhys can velcro on and off.

Finally, the purple page is a simple little abacus activity to practice counting!  The purple felt warped a little while I was pulling the strings tight to sew them down, but at least I know the strings and beads are secure!


Here's a close up of the button holes...next time I might make them a little bigger but I think these worked out well for a first attempt!


Tuesday, December 1, 2015

Felt Christmas Advent Calendar


Last year, I decided to make a felt advent calendar as a new Christmas tradition for our family.  It was my first felt project and it took me weeks to finish it, but I was so proud of the outcome!  I never had a chance to take decent pictures of it, so better late than never :)

I've learned so much since last year and I know this process would go a lot quicker if I attempted it now (I hand cut all of those numbers!), but this project was definitely a huge undertaking!  I wanted to make an heirloom piece that we could add to and update throughout the years, so I'm happy that I put a lot of time and thought into it.  I hand sewed the entire thing except for the advent pockets!  The ornaments are all made out of felt and embroidery floss, and I glued a small loop of satin ribbon to each one to hang it on the tree.


I hand stitched a white outline around the tree and hand stitched all 24 buttons onto it.  I used my sewing machine to sew the advent pockets. I layered four strips of felt on top of a large square piece of felt so that they were each slightly overlapping, and sewed vertical lines on top of them to make the separate pockets.


I scoured Pinterest for ornament ideas, made a list of what I wanted to make, then hand cut and hand stitched all 24 of them! I plan to update some in a few years once I get better at hand sewing.  I also realized after I took these pictures that one of the ornaments was still hiding in a pocket...it's a small red heart in case anyone is wondering :)


Monday, November 23, 2015

Bright & Colorful Busy Mat


When a friend contacted me to make a custom busy mat for her daughter, the first thing she requested was bright, bold colors.  I'm so happy she did because this turned out to be one of my favorite projects! I even found fabric to match the colors on the mat, and the fabric has silver sparkles for an extra bit of fun!

This mat is also one of my favorite projects because it incorporates so many activities all in one toy! It has FIVE activities on the inside and a zippered pocket on the back to store the lose pieces.  I love how *busy* this busy mat is and I hope it keeps its new owner happy and entertained during her travels!


*Safety note about the shoe lacing activity - if you make one for your child, sew the laces down to prevent them from coming undone and becoming a potential hazard*


Close up of the pretty sparkles!


Copyright © 2014 Today I Felt Crafty